Posted by Ecomm Admin on

Onigiri Bar
- Cook Time: 30 Minutes
- Serves: 4
Directions
1. Prepare one or more fillings
-tuna mayo (one can drained tuna mixed with 2-4 tbsp kewpie mayo, 1 tbsp sliced green onions, salt and pepper to taste)
-chicken mayo (1 cup chopped cooked chicken breast mixed with 4 tbsp kewpie mayo, salt and pepper to taste, and optional 1 tbsp sliced green onions)
-salmon mayo (one can drained salmon mixed with 2-4 tbsp kewpie mayo, 1 tbsp sliced green onions, salt and pepper to taste)
-kimchi (chopped kimchi can be added to any onigiri)
-shrimp tempura (8 large tail-on peeled and de-veined shrimp, dipped into a batter made with 1/2 cup flour, 1/2 tsp baking powder, and 1/2 tsp salt mixed with 1/2 cup ice cold water; then deep fried in 350°F oil until crispy and cooked)
2. Choose your sauces
Different Bachan’s varieties compliment different fillings. Mix and match fillings and sauces to find your ultimate custom onigiri. Mix 1-2 tsp Bachan’s of choice to 1 tbsp filling of choice.
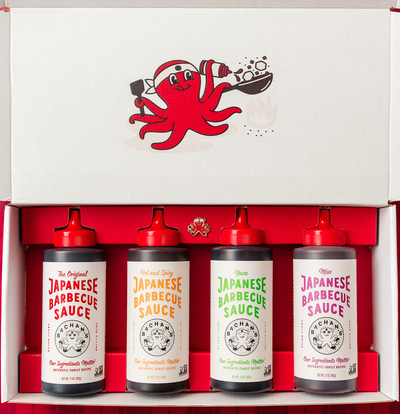
-Bachan’s Japanese Barbecue Sauce - the classic adds umami, depth, and an undeniable deliciousness. OG goes with everything.
-Bachan’s Hot and Spicy Barbecue Sauce - if you’re a spicy roll lover, Bachan’s Hot and Spicy Barbecue Sauce is for you. Hot and Spicy goes particularly well with salmon and gives kimchi even more of a kick.
-Bachan’s Miso Barbecue Sauce - slightly sweet and incredibly addictive. Pair miso with cooked meats like grilled chicken or steak for an extra hearty onigiri filling.
-Bachan’s Yuzu Barbecue Sauce - a bright and citrus forward sauce that goes exceptionally well with cubed sashimi grade fish and/or avocado.
3. Make your onigiri
To make onigiri, choose a shape, then lightly wet your hands (so the rice doesn’t stick) and sprinkle lightly with a tiny pinch of salt. You’ll need about 3/4 cup rice per onigiri, but you can make them as big or as small as you like.
-Triangle - this is the classic onigiri shape: Take about 1/2 cup of rice into your hands and flatten into a patty, with a slight indentation in the middle. Place your filling in the middle then add another 1/4 cup of rice on top of the filling. Gently compress the rice into a ball surrounding the filling. To shape into a triangle: use one hand to make a roof shape and keep your other hand flat. Press the rice gently into a triangle, without squeezing too hard.
-Round/ball - this is the easiest shape to make. If you’ve made a snowball, you know how to make ball onigiri. Grab some rice, gently flatten it, place your filling in the middle, then gently form the rice around the filling, shaping and compressing slightly, just the same way you would if you were making a snowball.
-Circle - a circle onigiri is just a round that has been flattened slightly. Make a ball as per the instructions above, then gently press it down into a thick circular disk.
-Musubi - the best way to make musubi is with a rectangular musubi mold. A musubi mold is a rectangular prism with no top or bottom that comes with a flat piece that you use to tamp down the rice. To use the mold: place it on a cutting board and put 1/2 cup of rice into it. Lightly press the rice down then add a layer of your filling of choice before topping with an other layer of rice. Gently compress everything together then slide the musubi out of the mold.
-Tenmusu - tenmusu is a specialty onigiri filled with prawn tempura. It’s made the exact same way triangle onigiri is made, but the end of the shrimp tempura sticks out one of the triangle points. To make tenmusu, start by dipping shrimp tempura into the Bachan’s of your choice. Set it aside, then lightly wet your hands and sprinkle with salt. Take 1/2 cup of rice into your hands and shape into a flat round. Place the Bachan’s sauced tempura in the middle of the round. If needed, top with an extra bit of rice then gently press the rice around the tempura, in a triangle shape.
4. Choose your wrapper
Once your onigiri is shaped, it’s time to decide on how you want to wrap it with seaweed. When wrapping onigiri, don’t forget: the shiny side of the seaweed faces out and the rough side touches the rice.
-Full wrapper - a full wrapper is what you get when you buy combini (convenience store) onigiri. Cut a full size nori sheet evenly in half. Take the half sheet of nori and place an onigiri on one edge. Fold the nori up and over the rice ball. Enjoy the contrast between the crunchy nori and the soft rice.
- Seaweed belt - seaweed belts are the most iconic onigiri wrapper – the ones you see in anime. A simple strip of seaweed is placed on the bottom and folded up on both sides. To do this, cut your sheet of nori into 1 inch by 4 inch strips. Lay down a strip of nori, then place the onigiri in the middle. Fold the nori up and over both sides.
-Seaweed coat - a seaweed coat represents a kimono wrapped around onigiri. To do a seaweed coat, cut a nori sheet into 4 even strips. Take a strip of nori and lay it down. Place a triangle rice ball in the middle. Wrap both sides of the nori towards and over the onigiri, folding the extra nori under the bottom.
Enjoy!

ingredients
• Bottle Bachan's Original Japanese Barbecue Sauce
• Bottle Bachan's Hot and Spicy Japanese Barbecue Sauce
• Bottle Bachan's Miso Japanese Barbecue Sauce
• Bottle Bachan's Yuzu Japanese Barbecue Sauce
• 9 cups freshly cooked, warm, but not hot, short grain rice
• fillings as desired (see below)
• toppings as desired (see below)
• salt to taste
• 12 sheets nori
Prep Time: 1 Hour 30 Minutes
Cook Time: 30 Minutes
Serves: 4